
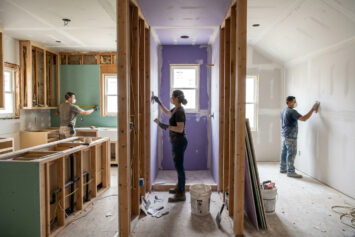
You are somewhere in the middle of a full-home renovation. Every trade has opinions about the schedule, the sequence keeps shifting, and the drywall phase is the one everyone is working toward but nobody seems to be coordinating around. When the drywall contractor finally shows up, they are inheriting every decision made by every trade that came before them, and any of those decisions that were not communicated clearly will surface as a problem in the drywall scope.
Drywall is not a passive phase in a renovation. It is the point of no return. Once the walls close, everything behind them is permanent. The decisions you make and the conditions you confirm before the drywall crew starts determine the quality, cost, and timeline of everything that follows.
Where Drywall Fits in the Full Renovation Sequence
What has to be completed before drywall installation can begin in a full-home renovation?
Drywall installation sits near the end of the rough-in phase and marks the transition to finish work. Before the first panel goes up, the following must be complete and, in most jurisdictions, inspected and approved by a building official.
| Phase | What Gets Done | Why It Must Precede Drywall |
|---|---|---|
| Framing | Structural walls, non-structural partitions, ceiling framing | Drywall is fastened to framing; any framing corrections after installation require demolition |
| Rough plumbing | Supply and drain lines, vent stacks, in-wall connections | Plumbing access behind closed walls requires cutting into finished drywall |
| Rough electrical | All wiring, junction boxes, panel rough-in | Electrical rough-in inspection required before wall closure in virtually all jurisdictions |
| HVAC rough-in | Duct runs, in-wall returns, equipment connections | Duct placement in walls and ceilings cannot be adjusted after drywall is installed |
| Insulation | Batt, blown, or rigid insulation as specified | Insulation inspection typically required before wall closure; insulation cannot be added behind closed walls without demolition |
| Low-voltage rough-in | Data, audio, security, and structured wiring | Low-voltage work often scheduled separately from electrical; frequently missed and requires drywall cuts to correct |
| Specialty blocking | Wood backing for future wall mounts, grab bars, built-ins | Adding blocking after drywall is installed requires cutting into finished walls; this is the last practical opportunity to install it |
In most full renovations, a 15 percent budget contingency is the standard recommendation from project management professionals. The drywall phase is where a disproportionate share of that contingency gets consumed, not because the drywall scope is inherently unpredictable, but because it absorbs unresolved decisions and undocumented changes from every prior trade. A project manager or homeowner who tracks those changes carefully before the drywall phase begins protects that contingency for genuine surprises rather than preventable corrections.
The Pre-Drywall Walkthrough: The Most Important Meeting in Your Renovation
What is a pre-drywall walkthrough and why does it matter?
Before any drywall is installed, a formal walkthrough of the framing with every relevant party present is the single most important meeting in a full renovation. This is the last moment when the cost of corrections is measured in minutes of labor rather than hours of demolition and rework. Every item that is missed or assumed rather than confirmed at this stage becomes an expensive problem after the walls close.
The walkthrough should include the homeowner, the general contractor or project manager, the drywall contractor, and ideally the electrician and plumber. Each participant is looking for different things, and the combination of perspectives catches problems that any single trade would miss on their own.
At the pre-drywall walkthrough, confirm all of the following before anyone hangs a sheet:
- All rough-in inspections have passed. Verify directly with the building department, not only with the contractor who pulled the permits. Proceed with drywall before a rough-in inspection has passed and you may face a requirement to open the walls again at significant cost.
- Every electrical box, outlet, switch, and fixture location matches the design plan. A misplaced junction box is a one-minute correction before drywall and a three-hour correction after it.
- All low-voltage work is complete. Data lines, security wiring, speaker wiring, and structured media wiring are frequently scheduled late and not always coordinated with the GC’s drywall timeline. Confirm these runs are in place before the crew arrives.
- All blocking is installed for wall-mounted items. TV mounts, floating shelves, grab bars in bathrooms, large mirrors, and future built-in units all require solid wood backing between studs. This is the only cost-effective time to install it.
- Framing is plumb, square, and free of bowed or twisted studs. The drywall contractor should run a straightedge across walls and ceilings and flag any framing that will prevent a flat finish. A good contractor includes this check as part of their process; a homeowner managing their own project should request it explicitly.
- Finish level for each room is confirmed in writing. If different rooms call for different finish levels, document this clearly before the crew starts. Changing the finish level specification after work has begun creates additional labor cost and timeline disruption.
Most experienced drywall contractors who work on full renovations document what they find during the pre-drywall walkthrough and share it with the GC before proceeding. A homeowner managing without a GC should ask the drywall contractor for a written pre-start checklist and resolve every flagged item before authorizing the start of installation.
Scope Creep in Drywall: How Costs Grow After the Contract Is Signed
Why does the drywall scope often cost more than the original quote in a full renovation?
Drywall scope creep in a full renovation almost always originates from changes made by other trades after the drywall quote was written. Every added outlet, repositioned light fixture, moved plumbing connection, or extended HVAC duct that was not in the original plan creates additional work at the drywall stage: patching around new boxes, adjusting panel cuts, reframing openings, or expanding the scope to cover surfaces that were not originally included.
The problem is compounded when those changes are communicated informally or not at all. A homeowner who approves a relocated kitchen light fixture verbally with the electrician but does not notify the drywall contractor has created a scope gap. When the drywall crew encounters a box in a different location than the plan shows, they stop, wait, or improvise, and each of those outcomes costs more than a five-minute conversation before installation started.
Managing drywall scope creep requires a simple discipline: every change order from any trade that affects a wall, ceiling, or floor surface is documented and communicated to the drywall contractor before they start the affected area. In a GC-managed project, this is the GC’s job. In a homeowner-managed project, it is your job, and it is the task that most homeowners underestimate until a change order arrives.
The Finish Level Decision: When It Has to Be Locked In
When in a full renovation should you decide on drywall finish levels?
Finish level must be specified before the drywall crew begins work, not after the panels are hung. The difference between a Level 4 and Level 5 finish affects material quantities, labor time, and scheduling for the taping and finishing phases. A contractor who bids and crews for Level 4 work cannot switch to Level 5 mid-project without renegotiating scope and adjusting schedule. In a full renovation where painter scheduling follows immediately behind the drywall finish, that renegotiation affects not just the drywall contractor but everyone behind them in the sequence.
Level 4 is appropriate for most residential rooms that will receive flat or eggshell paint. Level 5 is appropriate for any room where high-gloss or semi-gloss paint will be used, where direct or raking light from large windows or directional fixtures will strike the walls, or where the design calls for a premium modern aesthetic. In upper-end renovations, specifying Level 5 throughout creates a consistent quality impression that buyers and occupants perceive as craftsmanship. In standard renovations, it adds cost without proportional benefit in most rooms.
Decide on finish level by room during the planning phase, document it in the drywall contract, and do not change it after work has begun. The same rule applies to board type specifications: moisture-resistant board in bathrooms and basements, fire-rated board in garages and mechanical rooms. These decisions should be explicit in the scope of work, not left to field decisions by the installation crew.
Managing the Drywall-to-Paint Handoff: The Scheduling Gap That Delays Renovations
How do you coordinate drywall finishing and painting to avoid project delays?
The drywall-to-paint handoff is one of the most commonly mismanaged transitions in a full renovation schedule. Drywall finishing requires two to three coats of joint compound with mandatory drying time between each coat, totaling four to seven calendar days for a standard scope from taping through final sanding. Painting cannot begin until the final coat is fully dry, sanded, and primed.
The scheduling error that consumes the most time on renovation projects is treating this handoff as a same-day transition, where the painter is scheduled to arrive the morning after the drywall crew declares the work complete. Any residual drying time required, any touch-up discovered during a fresh-eyes inspection, or any final priming that was not completed before the painter arrived adds idle time for the painter and a cascade delay to every trade behind them.
A one to two business day buffer between the drywall crew’s final sign-off and the painter’s start date is standard practice among project managers who run full renovations efficiently. That buffer accommodates the final inspection, any touch-ups, and primer application. Homeowners managing their own renovations should build this buffer explicitly into the schedule rather than booking painter and drywall finish dates back-to-back.
GC Sub vs. Independent Contractor: Which Drywall Arrangement Works Better
Should you hire your own drywall contractor or use the general contractor’s subcontractor?
In a GC-managed renovation, the GC typically uses a trusted drywall subcontractor from their network. This arrangement has real advantages: the GC manages scheduling, coordinates the pre-drywall walkthrough, handles change order communication, and is accountable for the result as part of the larger project contract. A homeowner who wants one point of contact and clear project accountability accepts this arrangement and verifies the sub’s experience and license before agreeing to it.
In a homeowner-managed renovation, hiring an independent drywall contractor requires more direct coordination but gives you more control over contractor selection, pricing, and quality standards. The tradeoff is that you absorb the coordination functions the GC would otherwise handle. Most experienced independent drywall contractors who work on homeowner-managed renovations have navigated this dynamic before and can advise on sequencing, what to confirm with prior trades, and what information they need before their first day on site.
Regardless of which arrangement you use, the drywall contractor should be involved in the pre-drywall walkthrough, should receive written documentation of the finish level and board type specifications, and should have a direct communication channel for flagging conditions discovered during installation that affect scope or timeline.
Find a Drywall Contractor Ready for Full Renovation Coordination
A full renovation is not the right context for a contractor who has only worked on isolated repairs or small additions. The right professional for this scope understands trade sequencing, communicates proactively when they discover conditions that affect the schedule, and can document their work clearly enough to satisfy lender inspections and permit sign-offs.
DrywallProCenter.com connects homeowners with verified drywall professionals across the country. Search by zip code, compare contractor profiles, and request quotes from multiple pros in one place. Whether you are managing the renovation yourself or working with a GC, finding the right drywall contractor starts here.
Recent Drywall Articles
- Drywall Cost by Room: Kitchen, Bathroom, Bedroom Compared
 You are trying to budget for a renovation and you need a rough number for each room. The challenge is that drywall pricing is not consistent across room types. A … Read more
 - What Insurance Should My Drywall Contractor Have?You asked a contractor whether they are insured and they said yes. That answer, on its own, protects you almost not at all. There are multiple types of insurance a … Read more
- How to Get Multiple Drywall Bids and Actually Compare ThemYou have three quotes and the numbers are all over the place. One comes in at $1,900, one at $2,700, and one at $3,400. The instinct is to assume the … Read more
- What to Expect on Day One When Your Drywall Contractor ArrivesThe contractor is scheduled to arrive at 8 a.m. and you are not sure what is about to happen in your house. Will they start immediately or spend the morning … Read more
- Red Flags to Watch for When Hiring a Drywall ContractorYou have a few contractor quotes in hand and one of them is significantly cheaper than the others. Or a contractor showed up unsolicited after the storm last week and … Read more
- How to Read a Drywall Contractor’s Quote Without Getting BurnedYou have three quotes in hand and they are not close to each other. One comes in at $1,800, one at $2,600, and one at $3,100 for what appears to … Read more


This article was drafted with the assistance of AI and has been reviewed and edited by our editorial team for accuracy and quality.