
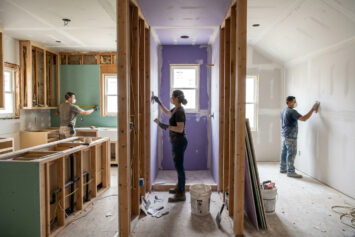
You had a repair done and the drywall looks fine. The patch is smooth, the compound dried flat, and the contractor seemed satisfied with the result. Then the painters came, applied the first coat, and suddenly a circle on your living room wall is clearly visible from the doorway. Not a bump, not a crack. Just a patch that does not look like the wall around it.
That is a texture match failure. It is the most common reason a drywall repair that passes close inspection looks wrong once paint is on, and it is the skill that separates a competent finish carpenter from a specialist who genuinely knows drywall.
Why Texture Matching Is Different From Applying Fresh Texture
What makes matching an existing texture harder than applying new texture?
Applying texture to a fresh, uniform surface is a skilled job. Matching texture on an existing wall is a fundamentally different and more difficult one. When you apply fresh texture to a new wall, you control every variable: the compound mix ratio, the spray pressure, the tool moisture, and the timing of any knockdown. You apply consistently across the whole surface and the result is uniform by definition.
When you are matching existing texture, the existing work sets the target and you have no control over how that target was originally created. The contractor who originally sprayed or hand-applied the texture 15 or 25 years ago may have used different equipment, a different compound consistency, or a slightly different hand technique than any contractor working today. The texture has since absorbed paint, settled, and aged. Even if a new application matches the pattern perfectly, the sheen, density, and paint absorption of the new section will be slightly different from the surrounding wall.
Most experienced drywall finishers describe texture matching as significantly more mentally demanding than fresh application. Fresh application requires execution. Matching requires reading an existing result, reverse-engineering what produced it, replicating it closely enough to be invisible, and accounting for how the new compound will look differently from the old under raking light once paint goes on.
The Lighting Problem: Why Texture Mismatches Only Show Under Certain Light
Why does a texture patch look fine up close but obvious from across the room?
This is the most frustrating aspect of a poor texture match, and it explains why homeowners sometimes sign off on a repair that looks adequate in person only to be unhappy when they see the final painted room.
Overhead flat lighting is forgiving. When a ceiling fixture or recessed light illuminates a wall from above, imperfections in the texture, including a patch that does not quite match in density or depth, cast almost no shadow and are very difficult to see. The same wall under raking light, where light hits at a shallow angle from a window, a lamp, or directional fixture, reveals every variation in surface topography with sharp clarity. A patch that matched the pattern but not the depth is immediately visible as a distinct zone under this lighting condition.
Good texture matching contractors test their work under raking light before declaring the job complete. A quick-dry contractor who inspects the finished patch under flat overhead light and moves on is not evaluating the result under the conditions where it will actually be noticed. When assessing a texture match before the painter arrives, take a portable light source and hold it at a 30-degree angle to the wall surface. That is the honest test of whether the match will be visible after paint.
How Texture Type Determines Matching Difficulty
Which wall textures are hardest to match invisibly?
Not all textures are equally forgiving of a close-but-not-exact match. Understanding where each texture type falls on the difficulty spectrum helps you set the right expectations when hiring for repair work.
| Texture Type | How It Is Applied | Matching Difficulty | Why |
|---|---|---|---|
| Orange peel | Sprayed; fine uniform splatter left to dry as-is | Moderate | Spray pressure and distance can be calibrated; consistent pattern has less variation to replicate |
| Knockdown | Sprayed, then partially flattened with a trowel before full dry | Moderate to difficult | Pattern timing and flattening pressure both affect final look; slightly inconsistent technique on the patch stands out |
| Skip trowel | Hand-applied with a curved trowel in overlapping irregular strokes | Difficult | Every contractor’s skip trowel looks slightly different; the original installer’s hand is essentially unique |
| Hawk and trowel | Hand-applied in layered wave patterns | Very difficult | Highly technique-dependent; an exact match requires finding a contractor whose natural application style resembles the original |
| Smooth (Level 5) | Skim coat applied and sanded flat | Moderate | No pattern to match, but any surface variation is visible; requires seamless feathering and careful blending |
| Popcorn (acoustic) | Heavy spray mixture applied thickly to ceiling | Very difficult | Original compound formulas varied; painted popcorn adds another mismatch layer; rarely achieves invisible repair |
Hand-applied textures like skip trowel and hawk and trowel are the most contractor-specific. Because each applicator develops their own pattern through years of hand work, the result is in some sense a personal fingerprint. Matching it requires either an exceptionally skilled finisher who can read and replicate the pattern closely, or in some cases, a decision to retexture the entire wall so that a single hand creates a consistent result throughout.
The Age Variable: Why Old Texture Is Harder to Match Than New
Does it matter how old the existing texture is when trying to match it?
Significantly, and this is the variable most homeowners do not anticipate. A wall that was textured, primed, and painted once in 1998 and has not been touched since has a surface that looks and behaves very differently from fresh joint compound. The texture has absorbed multiple layers of paint. The peaks and valleys of the pattern have been slightly softened by paint buildup. The paper facing of the underlying drywall has aged, changing how it accepts new compound and paint.
When a contractor applies new compound to a patch next to 25-year-old textured wall, the new section will initially absorb paint more aggressively than the surrounding surface, producing a slight color and sheen difference even when the pattern matches. A proper stain-blocking primer applied specifically to the new compound area before the finish coat helps equalize paint absorption, and skilled contractors include this step. A contractor who patches and walks away without addressing this primer consideration is setting up a visible patch after the first coat of paint.
The older the existing texture, the more important it is that the contractor understands this dynamic and addresses it explicitly. When getting quotes for a repair involving older textured walls, ask specifically what primer approach the contractor uses before applying texture and before painting.
How Skilled Contractors Actually Approach a Texture Match
What is the professional process for matching existing wall texture?
Most experienced drywall pros follow a consistent process when approaching a texture match that they intend to make invisible. Understanding this process helps you evaluate whether a contractor is taking the job seriously or shortcutting to speed.
The process should include:
- Texture identification under raking light: Before picking up a tool, the contractor examines the existing texture under a light held at a sharp angle to identify the pattern type, density, depth, and any distinctive characteristics of the application style.
- A test patch on a scrap board or inconspicuous area: For spray textures, the contractor calibrates spray pressure, nozzle distance, and compound consistency on a piece of scrap drywall before touching the repair area. For hand-applied textures, small test applications in a closet or hidden corner are used to develop the matching technique before committing to the visible wall.
- Cure and compare before proceeding: The test patch is allowed to dry fully, because wet compound looks nothing like cured compound. Once dry, the contractor compares the test result to the existing wall under raking light before applying to the repair area. Adjustments to spray settings or technique are made based on what the comparison reveals.
- Feathered edges on the new texture application: Rather than cutting the new texture to the exact boundary of the patch, skilled contractors feather the texture slightly beyond the patch edges, blending the transition zone between old and new work rather than creating a hard line.
- Dedicated primer on the new compound: A stain-blocking primer is applied specifically to the new compound before the finish coat, reducing the absorption differential between old and new surface and preventing the painted patch from looking slightly different in sheen from the surrounding wall.
Most drywall pros who work on texture matching regularly describe the test patch as the single most important step. A contractor who skips it and goes straight to the repair area is betting on a first-attempt match that experienced professionals know is rarely as close as one developed through a calibration process first.
The Cost Premium for Texture Matching Work
How much more does texture matching cost than a basic smooth repair?
Textured drywall repair typically runs 30 to 40 percent more than the same repair scope on a smooth wall. On a per-square-foot basis for the repair area, expect $70 to $95 per square foot for textured repairs versus $50 to $70 for smooth, based on 2026 contractor data.
For context, the cost of texture application on its own runs $0.80 to $2.00 per square foot for standard spray textures and $1.50 to $2.00 per square foot for hand-applied finishes. The premium for matching, as opposed to fresh application on a full surface, reflects the additional assessment, testing, and calibration work involved rather than a significant increase in materials.
Hand-applied textures carry the highest premium, particularly skip trowel and hawk and trowel, because they require the contractor to develop a matching hand technique that may take multiple test passes. For these textures, expect some contractors to recommend retexturing the full wall from corner to corner rather than attempting a patch match, because a seam-to-seam retexture can produce a cleaner visual result than an invisible patch that is simply not achievable given the original texture’s characteristics.
When to Call a Specialist Rather Than a General Handyman
Any drywall repair that requires matching existing texture should be approached as a specialist job, not a handyman task. The gap in quality between a contractor who does texture matching regularly and one who patches drywall occasionally is wider than the gap in most other trades, because the visual evidence of that gap becomes permanently visible every time raking light hits the wall.
Hire a dedicated drywall contractor with demonstrated texture matching experience when:
- The repair is in a high-visibility area: living room, master bedroom, hallways, or any room with significant natural light
- The existing texture is hand-applied, including any skip trowel, hawk and trowel, or heavily customized finish
- The existing texture is old, meaning it has been painted multiple times over many years
- The repair follows water damage, where the surrounding wall may also need assessment before texture work begins
- The project is pre-sale, where ceiling and wall quality will be examined during buyer inspection and in listing photos
- You have a specific finish level in mind, such as Level 5 smooth, and the repair must integrate seamlessly into a critical-lighting environment
Find a Drywall Contractor With Texture Matching Experience
Texture matching is a skill that reveals itself only in the finished result, which is why the contractor selection decision matters more here than in almost any other repair scenario. Ask to see examples of previous texture match work, specifically in conditions similar to your own wall, before hiring anyone for this job.
DrywallProCenter.com connects homeowners with verified drywall professionals across the country. Search by zip code, compare contractor profiles, and request quotes from multiple pros in one place. Whether you need a single patch matched or a full room retextured, finding the right specialist starts here.
Recent Drywall Articles
- Drywall Cost by Room: Kitchen, Bathroom, Bedroom Compared
 You are trying to budget for a renovation and you need a rough number for each room. The challenge is that drywall pricing is not consistent across room types. A … Read more
 - What Insurance Should My Drywall Contractor Have?You asked a contractor whether they are insured and they said yes. That answer, on its own, protects you almost not at all. There are multiple types of insurance a … Read more
- How to Get Multiple Drywall Bids and Actually Compare ThemYou have three quotes and the numbers are all over the place. One comes in at $1,900, one at $2,700, and one at $3,400. The instinct is to assume the … Read more
- What to Expect on Day One When Your Drywall Contractor ArrivesThe contractor is scheduled to arrive at 8 a.m. and you are not sure what is about to happen in your house. Will they start immediately or spend the morning … Read more
- Red Flags to Watch for When Hiring a Drywall ContractorYou have a few contractor quotes in hand and one of them is significantly cheaper than the others. Or a contractor showed up unsolicited after the storm last week and … Read more
- How to Read a Drywall Contractor’s Quote Without Getting BurnedYou have three quotes in hand and they are not close to each other. One comes in at $1,800, one at $2,600, and one at $3,100 for what appears to … Read more


This article was drafted with the assistance of AI and has been reviewed and edited by our editorial team for accuracy and quality.