
You started a drywall patch to save some money. The materials cost $30, the tutorials made it look manageable, and now you are three days into a project that does not look anything like you expected. The compound keeps cracking. The texture you attempted stands out from the surrounding wall. And you are starting to wonder whether the money you were trying to save is about to cost you more than hiring a professional from the start would have.
This is the most common point at which homeowners actually do the math on DIY drywall cost, and the calculation almost always comes out differently than it appeared at the start. Here is what the numbers actually look like at every stage of a drywall project, and where the break-even point between DIY and professional work really sits.
What DIY Drywall Cost Actually Includes
Why does DIY drywall end up costing more than just the price of the materials?
The most common mistake in DIY drywall cost estimation is treating it as a materials-only calculation. A 4-by-8-foot sheet of standard drywall runs $8 to $12 at retail. For a patch repair, you might use a fraction of one sheet. The apparent savings over a professional quote of $300 to $500 for the same repair look significant at first glance.
The complete DIY cost picture includes categories most homeowners do not account for until they are already mid-project:
| Cost Category | DIY Cost | What It Covers |
|---|---|---|
| Drywall materials (sheets) | $8 – $20 per sheet; $0.30 – $0.50 per sq ft | Same price whether you buy it or a contractor does, except contractors pay 15–25% less at trade pricing |
| Finishing supplies | $0.10 – $0.30 per sq ft; add $25–$60 per project for compound, tape, screws, corner bead | Joint compound, paper tape, screws, corner bead, sanding supplies |
| Tools (first project) | $200 – $500 to buy; $50 – $150 to rent | Drywall saw, jab saw, screw gun, mud pans, taping knives (6, 8, 10 inch), corner tools, sanding pole |
| Primer and paint | $50 – $150 depending on room size | Stain-blocking primer required before finish coat; often not included in professional drywall quotes either |
| Your time | 2–3 weeks for a room vs. 3–4 days for a professional crew | A professional crew completes 400–600 sq ft in 3–4 days; the same scope takes a first-time DIYer 2–3 weeks of evenings and weekends |
| Correction cost (if needed) | $0 if successful; 40–60% premium over original professional cost if not | Failed DIY repairs that require professional correction cost significantly more than hiring a pro from the start |
When tool costs are included, the DIY cost for a first-time project on a single room can approach or exceed professional material costs before any labor savings are realized. The labor savings are real on subsequent projects, once the tools are owned and the technique has improved. On a first project, the economics are much tighter than the materials-only estimate suggests.
The Professional Cost Baseline: What You Are Actually Comparing Against
What does professional drywall work actually cost in 2026?
Professional drywall installation runs $1.50 to $3.50 per square foot fully installed in 2026, covering hanging, taping, mudding, sanding, and finishing to a standard Level 4 surface. Labor represents 50 to 70 percent of that total cost. On a 1,000-square-foot project, materials alone run roughly $800 to $1,500; the professional installed price for the same scope runs $1,500 to $3,500.
For patch repairs, professional minimums matter more than per-square-foot rates. Most contractors charge a minimum service call of $100 to $160 regardless of how small the job is, reflecting travel time, setup, and cleanup. A standard small-to-medium patch repair runs $300 to $500, and larger repairs or ceiling work runs $500 to $1,500 or more.
One factor most DIY cost comparisons miss: contractors purchase materials at 15 to 25 percent below the retail price homeowners pay at hardware stores. A homeowner buying drywall at retail is not comparing the same material cost basis as a contractor who orders by the truckload from a distribution yard. This narrows the apparent DIY material savings further before labor is considered.
Where DIY Drywall Cost Makes Sense vs. Where It Does Not
For which drywall tasks does DIY actually deliver meaningful savings?
The DIY vs. professional cost equation is not the same across all drywall tasks. Hanging and finishing require completely different skill sets, and the cost leverage of DIY is very different for each.
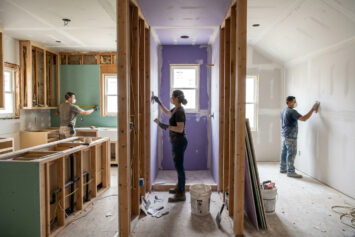
Hanging drywall, measuring, cutting, and fastening panels to framing, is physically demanding but technically accessible to a motivated homeowner. A capable DIYer hanging their own drywall on a 1,500-square-foot project can save $1,200 to $3,750 in hanging labor. The work is slow the first time and requires a helper for ceiling panels, but the standard for acceptable hanging is more forgiving than the standard for finished surfaces. Hanging is where DIY labor savings are most realistically captured.
Finishing, taping, mudding, sanding, and texturing, is where professional skill creates visible results and DIY attempts most commonly fail. Finishing requires calibrated hand pressure, proper feathering distances of 6 to 10 inches per coat, three or more coats with full drying time between each, and texture application that matches existing walls. These are skills that develop over hundreds of hours of practice. The result of a skilled finisher is invisible under any lighting condition. The result of a first-time finisher is frequently visible under raking light regardless of how much effort went into it.
The most cost-effective strategy on a large project is the hybrid approach: DIY the hanging and hire a professional taper and finisher for the finish work only. Finishing labor on a 1,500-square-foot project runs $750 to $1,500. This approach captures the bulk of the available DIY savings while ensuring the visible quality of the final result meets professional standards.
The Correction Premium: What a Failed DIY Attempt Actually Costs
How much more does it cost to fix a DIY drywall attempt that did not work?
This is the number that changes the DIY cost calculation most dramatically. Failed DIY repairs that need professional correction typically cost 40 to 60 percent more than hiring a professional for the original job would have. The premium exists because a contractor must assess, prepare, and correct what was started before doing their own work, adding labor time that would not have been needed on a fresh project.
A contractor who has worked in residential drywall repair for years described the pattern directly: homeowners regularly spend $500 on materials and 40 hours of weekend time, then pay $800 to have a professional fix the result properly. The total cost of that outcome, materials plus the correction fee, exceeds what the professional job would have cost by several hundred dollars, and the 40 hours of effort produce no lasting benefit.
The correction premium is not universal. Small repairs, nail holes and minor dings, can often be patched and finished acceptably by a patient first-timer. The correction premium concentrates in three scenarios: large patches where feathering and blending become critical, texture matching where a visible mismatch requires a professional to strip and redo the finish work, and ceiling repairs where the overhead work and finish demands exceed what most homeowners can produce without practice.
When Your Current Project Has Reached the Point of Diminishing Returns
How do you know when to stop a DIY drywall attempt and call a professional?
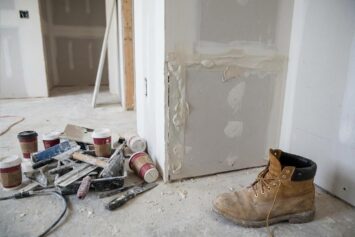
There is a specific moment in most failed DIY drywall projects where continuing makes the professional correction more expensive rather than less. That moment is when the problem has shifted from the original damage to what the repair attempt has done to the surrounding surface. Recognizing it early limits the total cost of the project.
Stop and call a professional when any of the following apply:
- You have applied more than two coats of compound and the repair area is still visibly raised, sunken, or ridged from a distance
- The texture you applied does not match and has already dried, making it part of the correction scope rather than something you can prevent
- Sanding has torn or abraded the paper face of the surrounding wall, creating an area that will absorb paint unevenly across a larger zone than the original damage
- You are approaching the point of painting and the repair is visible when you hold a light at a 30-degree angle to the wall surface
- The patch material is not flush with the surrounding wall despite compound application, indicating the structural repair needs to be addressed before any finish work proceeds
Most experienced drywall contractors who work on correction jobs note that the most expensive situations they encounter are not the ones where homeowners stopped early, but the ones where homeowners kept applying more compound in an attempt to fix the previous coat, building up an increasingly uneven surface that must be sanded flat or removed before professional finishing can begin.
What to Tell a Contractor When You Are Calling About a Failed DIY Job
How do you get an accurate quote for a repair that you started yourself?
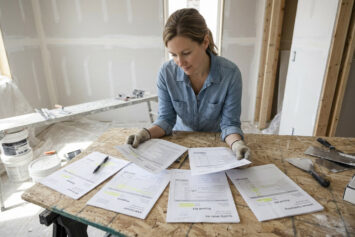
Contractors who work on residential repairs deal with failed DIY projects regularly. There is no benefit to downplaying what you did or tried. A contractor who understands the full situation gives you a more accurate quote than one who discovers complications after arriving on site.
When calling for quotes, provide:
- The size of the original damage and a description of the current state of the compound work
- How many coats you applied and whether you sanded between them
- Whether you applied any texture and what type, if known
- Whether the patch backing is structurally supported or whether you applied compound directly over a mesh patch on an unsupported opening
- The type of texture on the surrounding wall, or a description of it if you do not know the name
Photos taken in raking light, a portable light held at a 30-degree angle to the wall, show a contractor exactly what they will be correcting. This kind of preparation produces more reliable quotes and fewer surprises during the job, and it is the documentation that supports an accurate correction estimate rather than a padded one.
The Full Cost Comparison: DIY vs. Professional by Scenario
To summarize where the numbers land across common scenarios in 2026:
- Small nail hole or ding in a non-visible area: DIY kit $10 to $55, acceptable result likely. Professional minimum $100 to $160. DIY saves money here.
- Medium patch (4 to 12 inches) in a visible room: DIY materials $20 to $60, tools $200 to $500 if not owned, time 3 to 10 hours over multiple days. Professional $300 to $500. DIY is comparable in cost if tools are already owned and the finish is acceptable. Professional is lower-risk for a visible area.
- Full room installation: DIY materials $800 to $1,500 for 1,000 sq ft. Professional installed $1,500 to $3,500. Hybrid approach (DIY hang, professional finish) runs $1,200 to $2,500 and captures most of the savings with professional finish quality.
- Failed DIY correction: Original repair cost plus 40 to 60 percent premium plus the time and materials already spent. Almost always more expensive than the professional job would have been.
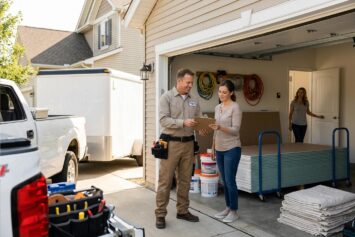
Find a Drywall Professional and Get an Accurate Quote
The right contractor will assess your specific situation honestly, tell you what is salvageable and what needs to be restarted, and provide a clear written quote that covers the full scope. That kind of transparency is worth finding before you add another coat of compound.
DrywallProCenter.com connects homeowners with verified drywall professionals across the country. Search by zip code, compare contractor profiles, and request quotes from multiple pros in one place. Whether you are mid-project or starting fresh, finding the right contractor starts here.
Recent Drywall Articles
- Drywall Cost by Room: Kitchen, Bathroom, Bedroom Compared
 You are trying to budget for a renovation and you need a rough number for each room. The challenge is that drywall pricing is not consistent across room types. A … Read more
 - What Insurance Should My Drywall Contractor Have?You asked a contractor whether they are insured and they said yes. That answer, on its own, protects you almost not at all. There are multiple types of insurance a … Read more
- How to Get Multiple Drywall Bids and Actually Compare ThemYou have three quotes and the numbers are all over the place. One comes in at $1,900, one at $2,700, and one at $3,400. The instinct is to assume the … Read more
- What to Expect on Day One When Your Drywall Contractor ArrivesThe contractor is scheduled to arrive at 8 a.m. and you are not sure what is about to happen in your house. Will they start immediately or spend the morning … Read more
- Red Flags to Watch for When Hiring a Drywall ContractorYou have a few contractor quotes in hand and one of them is significantly cheaper than the others. Or a contractor showed up unsolicited after the storm last week and … Read more
- How to Read a Drywall Contractor’s Quote Without Getting BurnedYou have three quotes in hand and they are not close to each other. One comes in at $1,800, one at $2,600, and one at $3,100 for what appears to … Read more


This article was drafted with the assistance of AI and has been reviewed and edited by our editorial team for accuracy and quality.