
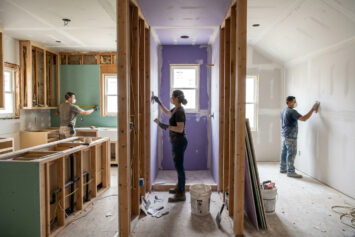
Finishing a basement is one of the highest-return projects a homeowner can undertake, but it is also one of the most technically demanding. The drywall phase looks straightforward on the surface. Hang sheets, tape, mud, paint. In a basement, the reality is more complicated: you are working below grade, surrounded by concrete, often with utilities running through the ceiling and walls, and in an environment where moisture management is not optional.
Get the sequence right and your basement becomes a real room. Get it wrong and you are dealing with mold, failed finishes, or rework inside closed walls within a few years.
Moisture First: The Step That Cannot Be Skipped
How do you know if a basement is ready for drywall?
Any active water intrusion, wall seepage, or floor dampness must be resolved before a single stud goes up, let alone a sheet of drywall. Finishing over a wet or intermittently damp basement does not seal the moisture inside harmlessly. It creates a concealed environment where mold grows on the back of drywall, in insulation, and along wood framing, often without becoming visible until the damage is extensive.
Before work begins, check for efflorescence, the white mineral deposits that appear on concrete walls when water has been moving through them. Look for staining at the base of walls, soft spots in any existing framing, and any musty odor that intensifies in humid weather. A simple plastic sheet test, where a 12-by-12-inch piece of plastic film is taped flat against the concrete floor or wall and left for 24 to 48 hours, can reveal whether vapor is migrating through the concrete surface. Condensation on the underside of the plastic means vapor is coming through; condensation on top means it is ambient humidity in the air.
Most drywall pros will not provide a binding quote for a basement until they can confirm that active moisture has been addressed. A contractor who bids enthusiastically without asking about moisture history is not a contractor who will be accountable when problems emerge six months later.
The Framing Gap: Why Drywall Cannot Go Directly on Concrete
Can you attach drywall directly to concrete basement walls?
No, and this surprises a lot of homeowners who expect to save time and cost by eliminating framing. Concrete walls are cold surfaces. When warm interior air contacts a cold concrete wall, condensation forms. If drywall is attached directly to concrete, that condensation forms behind the panel where there is no air circulation, saturating the paper facing and creating near-ideal conditions for mold.
The correct assembly for a below-grade concrete wall is a gap or insulation layer against the concrete, followed by a framed stud wall that keeps the drywall separated from the cold surface. Rigid foam insulation installed against the concrete before framing provides both thermal performance and a vapor control layer. Paper-faced fiberglass batt insulation should not be placed directly against concrete because the paper facing absorbs moisture and is itself a food source for mold.
This framing requirement also has a practical consequence for your floor plan. Every exterior wall in the basement will be inset by 3.5 to 5.5 inches from the concrete face to accommodate framing. For a 1,000-square-foot basement, that framing offset around the perimeter reduces usable floor area by a meaningful amount. Your contractor should account for this in any layout discussions before framing begins.
Board Type Selection: Not All Drywall Is Equal Below Grade
What type of drywall should be used in a basement?
The moisture environment below grade makes board selection more consequential than in above-grade rooms. Standard drywall is not appropriate for exterior basement walls or in any area where humidity levels routinely exceed normal interior conditions.
| Board Type | Where It Belongs in a Basement | Key Reason |
|---|---|---|
| Standard 1/2-inch drywall | Interior partition walls well removed from concrete; office, bedroom, common area walls | Acceptable where moisture is controlled and walls are interior-facing |
| Moisture-resistant drywall (paperless or treated paper facing) | All exterior walls in contact with or near concrete; any area prone to humidity | Resistant to mold and mildew; holds up in fluctuating humidity conditions |
| 5/8-inch Type X (fire-rated) | Mechanical rooms, utility areas, garage walls shared with living space | Required by code in most jurisdictions for fire separation between attached garage and living space |
| Moisture-resistant board (cement board or equivalent) | Basement bathroom wet walls, tub surrounds | Paper-faced drywall fails behind tile in wet applications regardless of moisture rating |
Confirming which board type applies to which wall before the contractor orders materials prevents a common and expensive mid-project correction. Most drywall pros recommend specifying board type by wall category in the written contract rather than leaving it as a field decision for the installation crew.
The Ceiling Decision: The Choice That Changes the Entire Budget
Should you drywall a basement ceiling or use a drop ceiling?
This is the most consequential scope decision in basement finishing, and it is one most homeowners underestimate until they are standing in front of a dense grid of HVAC ducts, plumbing, and electrical runs looking at their options.
Drywalled ceilings produce a cleaner finish, are generally preferred for bedrooms and living areas, and cannot be easily distinguished from above-grade spaces once painted. They also eliminate access to everything above them. Every junction box, clean-out, shut-off valve, and mechanical connection above a drywalled basement ceiling requires a framed and finished access panel to remain reachable, or it disappears behind drywall entirely.
Drop ceilings, which use a suspended grid holding removable tiles, preserve access to all utilities above. They cost less to install than a taped and finished drywall ceiling, and they are easier to replace in sections after water events. Their downside is they require 3 to 4 inches of vertical clearance for the grid, which can be critical in a basement where ceiling height is already tight.
A third option that works in utility-heavy basements is leaving structural joists exposed and painting them. This approach requires minimal labor, preserves full access, and reads as intentional in the right design context. It eliminates the drywall ceiling scope entirely and redirects that budget toward walls and finishes where the quality investment is more visible.
The right choice depends on your ceiling height after finishes, how many utility penetrations exist, and how the space will be used. A contractor who walks the ceiling before quoting can tell you which option is realistic given what is up there.
Ceiling Height: The Number That Governs Everything
How much ceiling height do you actually need for a finished basement?
Most jurisdictions require a minimum of 7 feet of clear ceiling height for any room designated as habitable living space. That minimum is measured from finished floor to finished ceiling, not from slab to joist. The distinction matters significantly in planning.
If your slab-to-joist measurement is 8 feet, here is what that headroom actually leaves you after common finishes:
- Subfloor system over slab: 1.5 to 2 inches
- Finished flooring over subfloor: 0.25 to 0.75 inches
- Ceiling drywall hung below joists: 0.5 inches for the panel plus framing depth if a chase is needed
- Net finished clearance with standard subfloor and drywall ceiling: approximately 7 feet 6 inches to 7 feet 9 inches
If your slab-to-joist measurement is 7 feet 6 inches or less, you may not be able to accommodate a standard subfloor and a drywalled ceiling while still meeting the 7-foot habitable space minimum. In that scenario, options include installing luxury vinyl plank directly on the slab without a subfloor, eliminating the drywall ceiling in favor of painted joists, or accepting that the space cannot legally be designated as a bedroom.
Measure your actual slab-to-joist clearance and do the math before finalizing the scope. A contractor who does not address ceiling height before quoting has not fully assessed the project.
Radon and Utility Planning: What Needs to Happen Before the Walls Close
What should be done before drywall goes up in a basement?
Two items belong on your pre-drywall checklist that most homeowners only think about after the walls are closed, at which point addressing them costs significantly more.
Radon rough-in. Radon is a colorless, odorless radioactive gas that enters homes through the soil beneath the foundation. If radon levels in your basement test above 4 picocuries per liter (pCi/L), mitigation is required before the space is used as living area. Installing passive radon piping during the basement finishing project costs very little compared to retrofitting it through a finished ceiling later. The rough-in involves a PVC pipe running from below the slab through the ceiling and out through the roof, capped at the top until activation is needed. Even if your test result is below 4 pCi/L, roughing in the pipe during construction is inexpensive insurance against future elevation.
Utility access panels. Every mechanical connection, shut-off valve, cleanout, and junction box above or behind your basement walls must either remain accessible or be abandoned before drywall installation. Most drywall pros recommend walking the basement with the homeowner before hanging begins specifically to identify access points, mark their locations, and confirm which ones need framed access panels built into the finished wall or ceiling. A plumber or HVAC technician who needs to reach a connection in a finished basement without an access panel will be cutting through your finished drywall. Plan for it before the walls go up.
Permits and Inspections: What the Code Requires for a Finished Basement
Do you need a permit to drywall a basement?
In most jurisdictions, converting an unfinished basement to habitable living space requires a building permit, regardless of whether you are adding a bathroom or simply framing and drywalling. Even work limited to framing walls and installing drywall counts as creating livable area in the eyes of most building departments, and that triggers permit requirements.
Permits matter for several practical reasons beyond code compliance. Permitted work is inspected at each phase, which means a building official confirms that framing, electrical, plumbing, insulation, and the drywall installation itself meet code before the project closes. That inspection record protects you when you sell the home, because unpermitted finished basement space can surface during a buyer’s inspection and create complications that range from required disclosure to demolition orders.
The permit sequence for a typical basement finish includes separate permits for building, electrical, and plumbing work, with inspections at rough-in stages before drywall can be installed. Your contractor should be familiar with local requirements and pull the appropriate permits in their own name, not yours. A contractor who suggests pulling permits in the homeowner’s name is transferring liability that belongs on the contractor’s license.
When to Hire a Specialist Rather Than a General Contractor’s Sub
Basement drywall is technically demanding enough that the quality of the finish contractor matters more than it does in an above-grade room. Moisture-appropriate board selection, access panel placement, fire-rating compliance at utility room walls, and texture finishing in a space with irregular framing around pipes and ductwork are all skills that vary significantly between contractors.
Hire a dedicated drywall contractor with demonstrated basement experience when:
- The basement includes exterior walls adjacent to concrete in any form
- The project includes a bathroom, which requires multiple board types within a small area
- The ceiling involves a mix of drywalled sections and access panels around utilities
- Ceiling height is tight and the contractor needs to understand finish stack-up before quoting
- The project requires fire-rated assemblies in mechanical rooms or garage walls
- The project is permitted and will be inspected, where installation quality is verified against approved plans
Find a Drywall Contractor With Basement Experience
A basement finish is not the place for a contractor who has not worked below grade before. The right professional understands moisture management, knows which board types belong where, plans for utility access before the walls close, and can coordinate with your other trades on a permit-driven inspection schedule.
DrywallProCenter.com connects homeowners with verified drywall professionals across the country. Search by zip code, compare contractor profiles, and request quotes from multiple pros in one place. Whether you are finishing an open basement or working around a complex utility layout, finding the right contractor starts here.
Recent Drywall Articles
- Drywall Cost by Room: Kitchen, Bathroom, Bedroom Compared
 You are trying to budget for a renovation and you need a rough number for each room. The challenge is that drywall pricing is not consistent across room types. A … Read more
 - What Insurance Should My Drywall Contractor Have?You asked a contractor whether they are insured and they said yes. That answer, on its own, protects you almost not at all. There are multiple types of insurance a … Read more
- How to Get Multiple Drywall Bids and Actually Compare ThemYou have three quotes and the numbers are all over the place. One comes in at $1,900, one at $2,700, and one at $3,400. The instinct is to assume the … Read more
- What to Expect on Day One When Your Drywall Contractor ArrivesThe contractor is scheduled to arrive at 8 a.m. and you are not sure what is about to happen in your house. Will they start immediately or spend the morning … Read more
- Red Flags to Watch for When Hiring a Drywall ContractorYou have a few contractor quotes in hand and one of them is significantly cheaper than the others. Or a contractor showed up unsolicited after the storm last week and … Read more
- How to Read a Drywall Contractor’s Quote Without Getting BurnedYou have three quotes in hand and they are not close to each other. One comes in at $1,800, one at $2,600, and one at $3,100 for what appears to … Read more


This article was drafted with the assistance of AI and has been reviewed and edited by our editorial team for accuracy and quality.